For most beginners, the essential rock climbing gear includes climbing shoes, chalk, a harness, a helmet, a belay device, a locking carabiner, a dynamic rope for outdoor roped climbing, and a durable way to store and dry gear after use.
If you are picking up rock climbing for the first time, you do not need a full gear closet on day one. Most new climbers start at a gym, rent the technical items, and only buy their own gear once they know which type of climbing they enjoy.
This guide is written for complete beginners: gym climbers trying their first indoor session, boulderers building a home rack, and outdoor climbers preparing for a first day at the crag. It covers what you actually need to start, what is smart to rent, and what to buy once you decide to keep climbing.
Safety note: This article is a gear checklist, not an instruction. Rope systems, belaying, and anchor-building should be learned in person from a certified instructor or a staffed climbing gym before you use them outdoors.
Quick Beginner Rock Climbing Gear Checklist
Every style of climbing needs a slightly different kit. The table below breaks down what is actually required for indoor climbing, bouldering, and outdoor top rope or sport climbing, plus whether beginners can rent the item before buying.
| Gear item | Indoor climbing? | Bouldering? | Outdoor top rope/sport? | Beginner buying tip | Can beginners rent it? |
|---|---|---|---|---|---|
| Climbing shoes | Yes | Yes | Yes | Snug, not painful. A neutral, flat-lasted shoe is easiest to learn in. | Yes, at most gyms |
| Chalk and chalk bag | Optional | Yes | Yes | Buy this early. It is cheap and personal. | Rarely |
| Climbing harness | Yes (except bouldering) | No | Yes | Prioritize fit and adjustability over weight. | Yes, at most gyms |
| Climbing helmet | Rarely required | No | Yes, strongly recommended | Buy once you climb outside regularly. | Sometimes |
| Belay device | Yes | No | Yes | An assisted-braking device adds a margin of safety for new belayers. | Yes, at most gyms |
| Locking carabiner | Yes | No | Yes | A pear-shaped locker pairs well with most belay devices. | Sometimes |
| Dynamic climbing rope | Usually provided | No | Yes | Buy only once you climb outdoors with a partner regularly. | No, usually a partner’s rope |
| Crash pad | No | Yes, for outdoor bouldering | No | Split the cost with a climbing partner if possible. | Sometimes locally |
What Gear Do You Need for Indoor and Outdoor Climbing?
Indoor Climbing
Indoor climbing gyms are the easiest and safest place to start. Most gyms rent shoes, harnesses, chalk bags, and belay devices, so a first visit really only requires comfortable clothes and a willingness to try. Bouldering areas need even less: just shoes and chalk, since there is no rope or harness involved and the floor is padded.
Once you climb a few times and know you want to keep going, buying your own shoes, chalk bag, and harness is the usual next step. These three items are personal, get used every session, and are inexpensive enough to own early. Ropes, belay devices, and hard gear can wait until you are climbing outdoors.
If you plan to focus on gym or sport routes rather than trad or alpine objectives, our guide to sport climbing gear and techniques goes into more depth on the equipment and skills that carry over from the gym to the crag.
Outdoor Climbing
Outdoor climbing adds real risk that a gym removes: rockfall, weather, and gear that has to hold up outside a controlled environment. This is why a helmet moves from optional to strongly recommended, and why a partner check on harness and knots becomes a habit rather than a formality.
For top rope and sport climbing, the core list is: harness, helmet, belay device, locking carabiner, climbing shoes, chalk bag, and a dynamic rope rated for the type of climbing you are doing. Trad climbers add a rack of cams, nuts, slings, and extra carabiners, which is a purchase best made gradually and with guidance from a more experienced partner or a course.
If you are working toward bigger multi-day or mountain objectives, our mountain climbing gear checklist covers the additional layers, hardware, and navigation tools that alpine and mountaineering routes require beyond a standard cragging kit.
Essential Safety Equipment for Rock Climbing
A handful of items on this list are not optional. They are what keeps a fall, a slip, or a dropped piece of gear from becoming an injury, and every certified gym or guide will check for them before you leave the ground.
- A properly fitted harness. The single point connecting you to the rope. See the harness section below for sizing and fit.
- A helmet for outdoor climbing. Protects against rockfall and impact during a fall. Covered in the helmet and belay basics section.
- A locking carabiner. Used to attach the belay device to the belay loop for belaying and rappelling.
- An assisted-braking belay device. Adds a mechanical backup if a new belayer’s hand brake slips.
- A dynamic rope rated for the climbing you are doing. Dynamic ropes stretch to absorb the force of a fall; static ropes do not and are not used for lead climbing.
- Certified PPE. Look for CE and UIAA marks on harnesses, helmets, ropes, and hardware. These confirm the gear has been independently tested against the relevant safety standard.
Beyond the gear itself, a partner check before every climb, confirming the harness is buckled and doubled back, the knot is tied correctly, and the belay device is loaded properly, is as much a part of the safety kit as the equipment. This is a habit to build with a certified instructor or experienced partner, not something to learn from an article. The sections below go into detail on how to choose and fit each piece.
Climbing Shoes: Fit, Comfort, and Beginner Tips
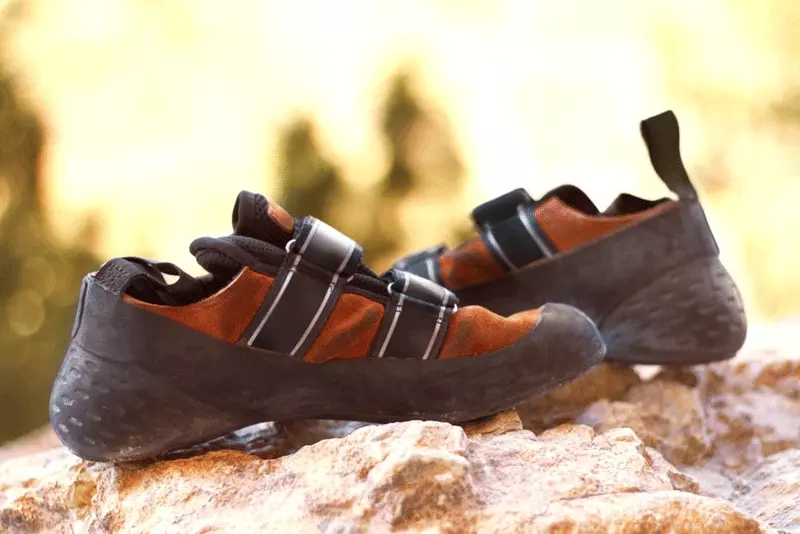
Climbing shoes are the one piece of gear where fit matters more than brand or price. They should feel snug through the heel and toe box with no dead space, but they should not be painful to stand in for a full session. A shoe that is too tight will distract you far more than a shoe that is slightly loose.
Beginners are best served by a flat-lasted, neutral shoe with a moderate amount of rubber and a comfortable fit, rather than an aggressive, downturned shoe built for steep sport routes. Neutral shoes are easier to stand in for long periods and forgive imperfect footwork while you build technique.
A few practical tips: try shoes on later in the day, when feet are slightly swollen; walk around the store or gym in them before buying; and remember that climbing shoes are meant only for climbing. Wearing them while hiking or approaching a crag wears down the rubber much faster than climbing does.
Best Rock Climbing Harness Features for Beginners
Editor’s note: this section covers the article’s named target keyword and previously had no dedicated content or image. Recommend adding a photo of a fitted harness here, similar in style to the shoes/helmet/belay device images above.
A harness connects you to the rope system, so understanding its parts helps you buy and use one correctly.
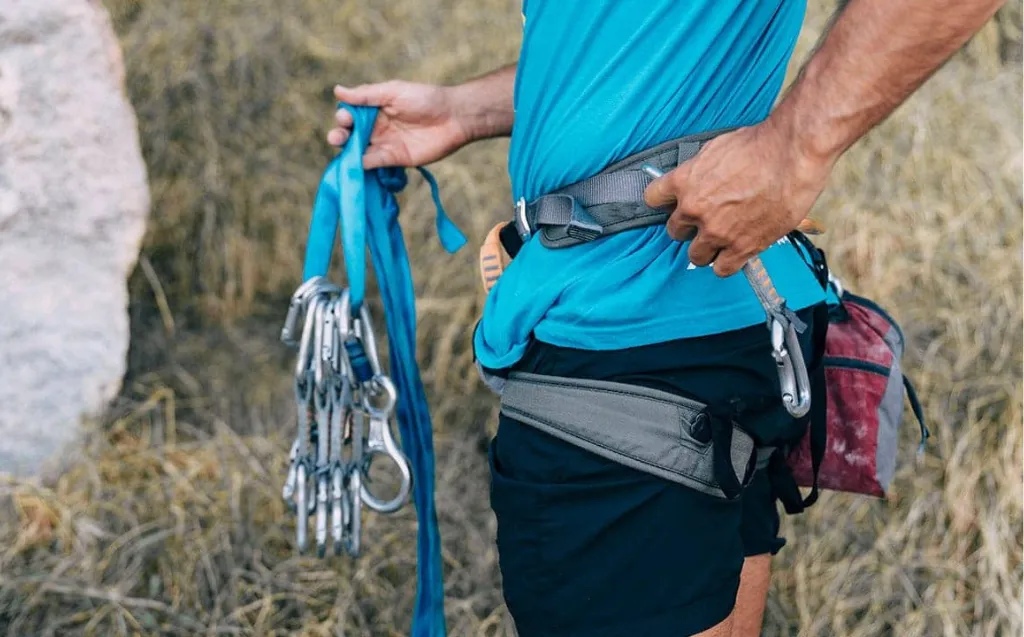
- Waist belt: The padded band that sits above your hips. It should be snug enough that it cannot slide down over your hip bones when weighted.
- Leg loops: Two padded loops that wrap around the upper thighs and share the load with the waist belt.
- Belay loop: The single strongest point on the harness. This is where a belay device or locking carabiner attaches, not the waist belt or leg loops individually.
- Gear loops: Small loops around the waist belt used to rack carabiners, cams, and quickdraws. Beginners on top rope routes rarely need more than two.
- Buckles: Allow you to adjust the waist belt and, on some harnesses, the leg loops. Every buckle should be doubled back through its slot before you climb.
Leg loops come in two styles. Fixed leg loops keep the harness lighter and simpler, which works fine for gym and warm-weather cragging. Adjustable leg loops use buckles so you can loosen them to fit over extra layers, which matters more for cold-weather, alpine, or mountaineering use. Beginners who only plan to climb indoors or at a warm local crag rarely need adjustable leg loops; those heading into colder or more varied conditions benefit from the flexibility.
Padding and comfort matter more than they might seem to at first. A well-padded waist belt and leg loops make a real difference once you are hanging in the harness to rest, work a move, or belay from the ground for an extended period. Thinner, minimalist harnesses shave weight but concentrate pressure, which is a poor trade for a beginner who has not yet built up tolerance for hanging in a harness.
A harness should fit snugly around the natural waist, above the hip bones, with no more than a flat hand’s width of slack once buckled and doubled back. Leg loops should be snug but allow a full range of leg movement. If you can pull the waist belt down over your hips while it is buckled, it is too loose and unsafe to climb in.
Harnesses are also built differently depending on climbing style:
- Gym or all-around harnesses: Minimal gear loops, simple adjustment, and a comfortable fit for short sessions. A good first purchase for most beginners.
- Sport climbing harnesses: Slightly more padding for hanging on bolts and working routes, with two to four gear loops.
- Trad climbing harnesses: Four or more gear loops to rack a full trad rack, plus extra waist padding for long days.
- Mountaineering or alpine harnesses: Lightweight, packable, and usually feature adjustable, drop-seat leg loops to fit over bulky clothing.
How to Size and Budget for a Beginner Harness
Most harnesses are sized by waist measurement rather than the standard clothing sizes you would use for pants, so measure your natural waist, above the hip bones, before buying. Manufacturers publish a size range in inches or centimeters for each size, and most models fit a range wide enough that exact sizing matters less than trying it on and doing the hip-bone test described above.
Harnesses are typically built as unisex or women’s-specific. Women’s harnesses usually shift the leg loops relative to the waist belt to fit a different waist-to-hip ratio; this matters more for comfort during long hangs than for safety, so either style works as long as it passes the fit and hip-bone check.
Weight is a smaller factor for a beginner than it will become later. A few extra ounces of padding in the waist belt and leg loops is a fair trade for comfort while you are still building tolerance for hanging in a harness. Shaving weight for a lighter, less padded harness becomes worth it once you are climbing regularly and know your own style.
On price, a harness is one of the least expensive pieces of climbing PPE relative to a rope, rack, or shoes, which is part of why it is a reasonable early purchase once you have decided to keep climbing. Widely used entry-level options, commonly recommended across gear guides for their adjustable fit and simple, all-around design, include the Black Diamond Momentum and the Petzl Corax. Either is a reasonable starting point for a gym or beginner-level outdoor harness; the fit and comfort checks above matter more than the specific model.
For a beginner, the safest advice is to prioritize comfort, adjustability, a correct fit, and certified climbing PPE over shaving grams with an advanced, minimalist design. A harness you can trust and sit comfortably in will always beat a lighter harness that fits poorly. REI’s guide on choosing a climbing harness is a useful reference for comparing harness types and sizing in more detail.
Helmet, Belay Device, Carabiners, and Rope Basics
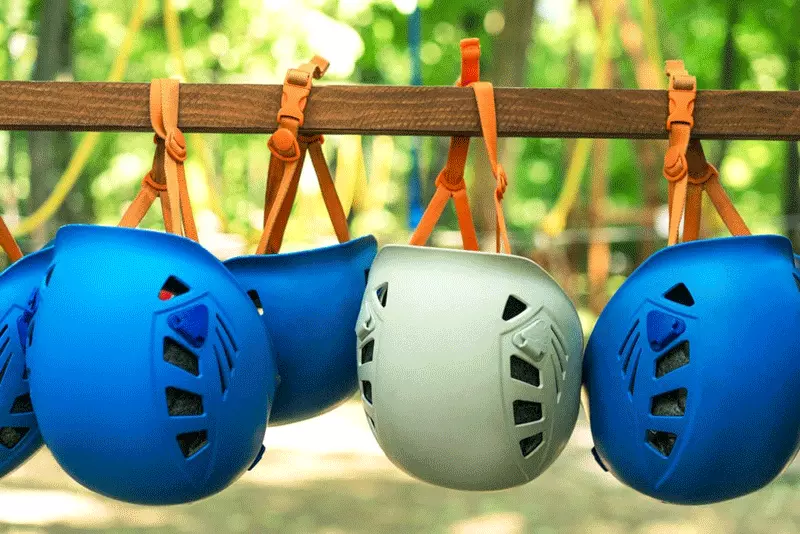
Climbing helmet. A helmet protects against falling rock, dropped gear, and impacts from flipping upside down or swinging into the wall during a fall. It is optional in most gyms but strongly recommended outdoors, where rockfalls are a real risk that a controlled gym environment does not pose. REI’s guide on choosing a climbing helmet breaks down the two main construction types and how to size one correctly.
You also need a climbing harness that has a waist belt and two leg loops. This is important for all forms of climbing besides bouldering; see the harness section above for how to choose and fit one correctly.
Carabiners. A locking carabiner attaches the belay device to the belay loop and should always be used for belaying and rappelling. Non-locking carabiners are used for racking gear and building quickdraws once you progress to leading. REI’s guide to choosing climbing carabiners explains the differences in shape and gate in plain terms.
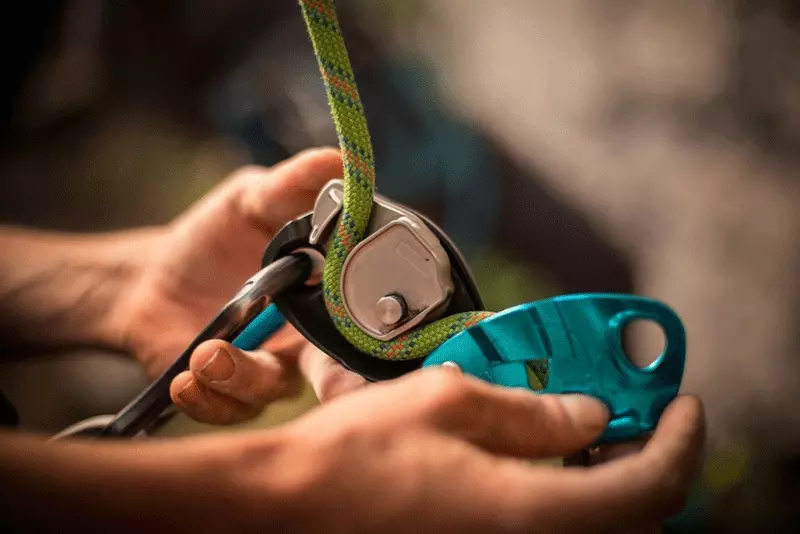
Belay device. This is the piece of hardware that lets a belayer control the rope as a climber moves. Tube-style devices are simple and affordable; assisted-braking devices add a mechanical backup if the belayer’s hand brake slips, which provides a meaningful safety margin for a new belayer still building good habits.
Rope. There are two different types of ropes. The first is static, and the other is dynamic. The dynamic ropes have more give in case of a fall, while the static ropes are used for rappelling rather than for catching lead falls. As a beginner, you will almost always be climbing on a partner’s or an instructor’s rope rather than owning one yourself.
All of this equipment falls under personal protective equipment, or PPE, and is built to internationally recognized safety standards. Look for gear marked with CE and UIAA certification, which confirms it has been independently tested against the relevant EN standard for that piece of equipment. The UIAA’s safety standards page explains how these ratings work across harnesses, helmets, ropes, and hardware.
Chalk, Chalk Bag, Clothing, and Small Accessories
Chalk keeps your hands dry and improves grip on holds. Most climbers carry it in a small chalk bag clipped to the waist belt or worn on its own belt. Some gyms and outdoor areas restrict chalk type, so it is worth checking local rules before buying a large supply.
Clothing for climbing should be athletic, breathable, and allow a full range of motion through the hips and shoulders. Avoid anything with loose drawstrings or bulky pockets that can snag on holds or gear. A light long-sleeve layer is useful outdoors for sun and rock abrasion protection on longer routes.
A brush for cleaning holds, a small first aid kit, and a headlamp for early starts or late finishes round out a sensible beginner kit without adding much weight or cost.
Rock Climbing Gear for Backpackers
Rock climbing equipment for backpackers has one constraint that gym or single-day cragging does not: every item has to be carried in, often for miles, before you even reach the rock. That changes which gear is worth prioritizing.
Start with the harness. A lighter, less padded harness is a reasonable trade on a multi-day approach, since you are less likely to hang in it for extended periods the way you would while working a sport route. Save the heavily padded, all-day-comfort harness for cragging trips where the car is nearby.
Rope choice matters more here than almost anywhere else. A thinner-diameter dynamic rope cuts real weight over a long approach, but it also wears faster and demands a belay device rated for that diameter, so this is a trade to make with an experienced partner rather than by weight alone. For a short multi-pitch objective, some parties split a single rope’s weight between two packs rather than each carrying a full rack.
Racking gear matters just as much as the rope. A compact set of cams, nuts, and slings, built out gradually rather than bought all at once, keeps pack weight down without leaving genuine gaps in protection. Our guide to backpacking gear storage covers how to pack technical gear so it stays dry and protected against abrasion on the approach, rather than loose at the bottom of a pack where it degrades faster and is harder to inspect.
Footwear is worth planning separately from climbing shoes. Climbing shoes are built for standing on small holds, not for miles of approach trail, so wearing them for the hike in wears down the rubber far faster than climbing itself does. A separate pair of approach shoes or boots protects the investment in your climbing shoes and is more comfortable over distance.
Rock Climbing Gear for First Responders
For first responders and public safety personnel who climb, whether for training, technical rescue work, or personal fitness, the equipment itself does not differ much from a standard beginner kit. What changes is how hard that gear works between uses.
Gear used for training or rescue work typically sees far more frequent handling than recreational gear: repeated transport between a vehicle and a training site, storage in a shared locker or gear room, and use by more than one person over its service life. That level of use makes routine inspection non-negotiable rather than a periodic habit. Check harnesses, ropes, and hardware for wear before and after every session, not just annually. Our section on how to inspect, clean, dry, and store climbing gear covers what to look for.
Shared storage is where a lot of this gear actually breaks down. A harness or rope bag left damp and compressed in a duffel or a crowded locker degrades faster than one that gets hung and dried properly between shifts, and damage is harder to catch during a quick pre-use check when gear is stored balled up. Keeping high-use gear on a dedicated hook or hanger rather than stuffed on a shelf makes both drying and inspection easier, which matters more when the same equipment gets handed off between team members.
Technical rescue systems, anchor building, and rope rescue techniques are beyond the scope of a gear checklist and should only be learned through certified rescue training, not from an article. This section covers the equipment and storage side of the job, not the technical skills.
What Beginners Should Rent vs Buy First
Rent first, if you are trying climbing for the first time: harness, helmet, belay device, and shoes. Almost every climbing gym offers these as part of a day pass, so there is no reason to buy before you know you enjoy the sport.
Buy first, if you plan to keep climbing: shoes, chalk bag, and a harness. These are personal, inexpensive relative to hard gear, and used every session regardless of climbing style.
Buy later, with instruction: rope, quickdraws, and outdoor anchor-building gear. These items carry real consequences if used incorrectly, so they are best purchased once you have taken a course or climbed regularly with an experienced, certified partner or guide.
Common Beginner Gear Mistakes to Avoid
- Buying a harness by price instead of fit. A harness that does not sit correctly above the hips is uncomfortable at best and unsafe at worst.
- Skipping the double-back check on buckles. An improperly threaded buckle can slip loose under load.
- Wearing climbing shoes for approaches or everyday use. This wears out the rubber far faster than climbing itself does.
- Buying a full trad rack before ever leading a route. Hard gear is expensive and easy to buy in the wrong sizes before you know what a specific climbing area actually requires.
- Storing wet or dirty gear in a stuffed bag. This traps moisture against nylon and foam, which speeds up material breakdown and can hide damage during a quick pre-climb check.
How to Inspect, Clean, Dry, and Store Climbing Gear
Climbing PPE has a limited service life, and manufacturers publish specific guidance on inspection and retirement. As a general rule, textile gear like harnesses, slings, and ropes has a maximum lifespan of around 10 years from the date of manufacture, including storage time, while metal hardware like carabiners can last much longer if it shows no wear, cracks, or deformation.
Before and after each use, check your harness for fraying webbing, worn stitching, and buckles that no longer hold their adjustment. Check ropes for flat spots, fuzzy sheaths, or stiff sections. Any gear that has taken a hard fall, been exposed to chemicals, or shows visible damage should be retired immediately, regardless of age. Petzl’s guide to inspecting a climbing harness walks through a full point-by-point check that applies to most harness brands.
After a climbing session, wipe down and air-dry any gear that got wet or sweaty before putting it away. Harnesses, helmets, and rope bags should be hung rather than balled up in the bottom of a pack, since hanging lets them dry fully and keeps padding and webbing from developing permanent creases.
Why Heavy-Duty Storage Matters for Climbing Gear
Most climbing gear damage does not happen on the wall. It happens between sessions, when a harness gets stuffed into a duffel still damp, a helmet gets crushed under a pile of clothes, or a rope bag sits balled up in a closet for weeks. Keeping gear off the floor and properly hung solves most of this.
A few storage habits go a long way: dry gear thoroughly before storing it, keep harnesses, helmets, rope bags, packs, and wet clothing off the floor rather than piling them in a corner, and avoid stuffing damp gear into a closed bag where moisture has nowhere to go. Our guide on the right way to hang and maintain outdoor sports equipment covers this in more detail across different types of gear.
Important safety note: Hang non-life-support items like packs, clothing layers, and rope bags on a sturdy hanger or hook. Do not hang life-support gear, such as your harness or rope, in a way that causes abrasion, sharp bends, chemical or UV exposure, or ongoing stress on a rated component.
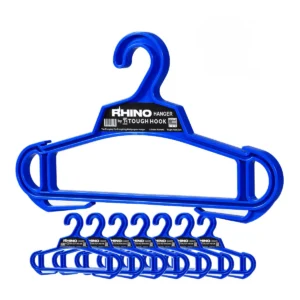
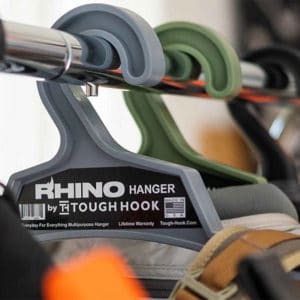
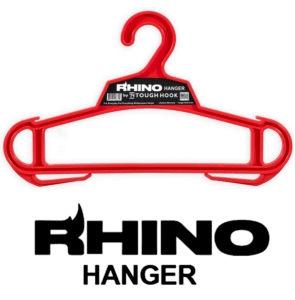
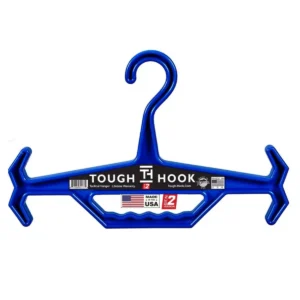
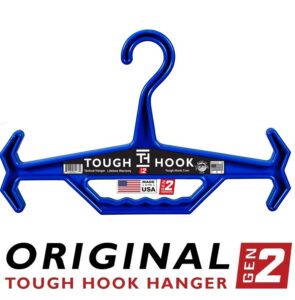
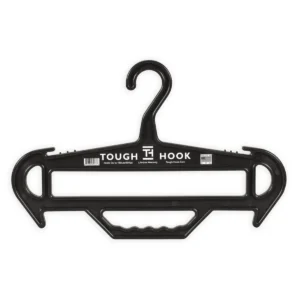
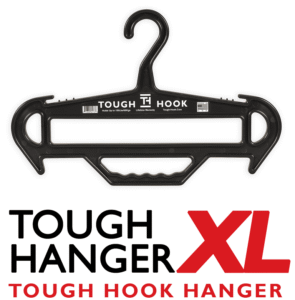
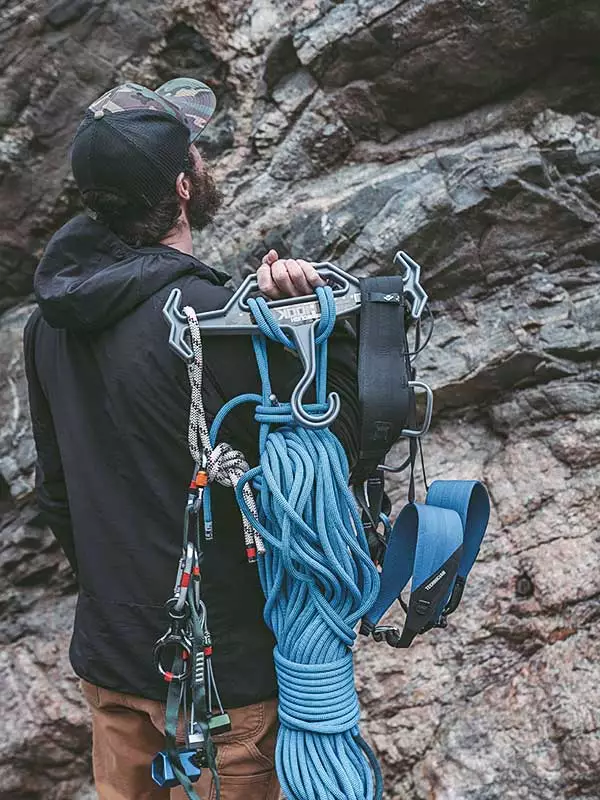
For the bulkier, heavier items in a climbing kit, a standard wire or plastic hanger tends to bend or snap under the weight of a loaded pack or a wet rope bag. A heavy-duty option like the Original Tough Hook, the RHINO Hanger, or the Tough Hanger XL is built to carry that kind of load without warping. If you climb while traveling or backpacking, our guide on backpacking gear storage covers hanger options for packs and trekking gear specifically, and our tips on how to store backpacks after a trek apply just as well to a climbing pack that has been rained on or dragged through mud.
ADD A TOUGH HOOK HANGER TO YOUR ROCK CLIMBING GEAR LIST:

Final Beginner Gear Checklist
- Climbing shoes (rent or buy)
- Chalk and chalk bag
- Harness (rent or buy, fitted correctly)
- Helmet (for outdoor climbing)
- Belay device
- Locking carabiner
- Comfortable, breathable athletic clothing
- Dynamic rope, quickdraws, and a trad rack (later, with instruction)
- A durable way to hang and dry gear between sessions
Frequently Asked Questions
What rock climbing gear does a beginner need first?
Climbing shoes, chalk, and access to a harness, helmet, and belay device cover almost every first session. Most of the technical items can be rented at a gym before you buy anything.
Do beginners need to buy a climbing harness?
Not right away. Most gyms rent harnesses, so it makes sense to try climbing a few times before buying one. Once you know you will keep climbing, a properly fitted harness is a worthwhile early purchase.
What is the best climbing harness type for beginners?
A simple, comfortable, all-around or gym harness with two to four gear loops is the best starting point for most beginners. Prioritize fit, padding, and adjustability over lightweight, minimalist designs built for advanced sport or alpine climbing.
Can I use the same gear for indoor and outdoor climbing?
Shoes, a harness, chalk, and a belay device generally work for both. Outdoor climbing requires a helmet, a rope, and locking carabiners, plus greater attention to weather and rockfalls.
What gear is needed for bouldering?
Bouldering needs the least gear of any climbing style: just climbing shoes and a chalk bag. Outdoor bouldering also requires a crash pad and a spotter, since there is no rope or harness involved.
How should I store climbing gear after use?
Dry gear fully before storing it, and keep harnesses, helmets, packs, and wet clothing off the floor rather than stuffed in a closed bag. Non-life-support items like packs and clothing can be hung on a heavy-duty hanger; life-support gear like your harness and rope should still be stored according to the manufacturer’s instructions.
How often should climbing gear be inspected?
Check your harness, rope, and hardware before and after every session for visible wear, and follow the manufacturer’s recommended full inspection schedule, which is typically once every 12 months for regularly used PPE.
What gear should beginners avoid buying too early?
A full trad rack, a personal rope, and quickdraws are all better purchased after you have taken instruction and climbed outdoors regularly with an experienced partner or guide, since buying the wrong sizes or using them incorrectly carries real risk.